> ## Documentation Index
> Fetch the complete documentation index at: https://docs2.zenskar.com/llms.txt
> Use this file to discover all available pages before exploring further.
# Business entities
### Definition
In Zenskar, a **business entity** is a company wholly controlled by another company called a holding company or parent. A business entity is also known as a subsidiary.
In Zenskar, an **organization** is the holding company or parent that wholly controls all business entities.
## Organization
An organization is created in Zenskar when you create an account. To view the organization details, do the following:
1. Click on the drop-up menu with your name, as shown below.
2. Click on the **Settings** option.
3. The organization details are shown in the **General** tab of the **Settings** page, as shown below.
## Business entities in Zenskar
A default business entity is created for every organization.
### View business entities
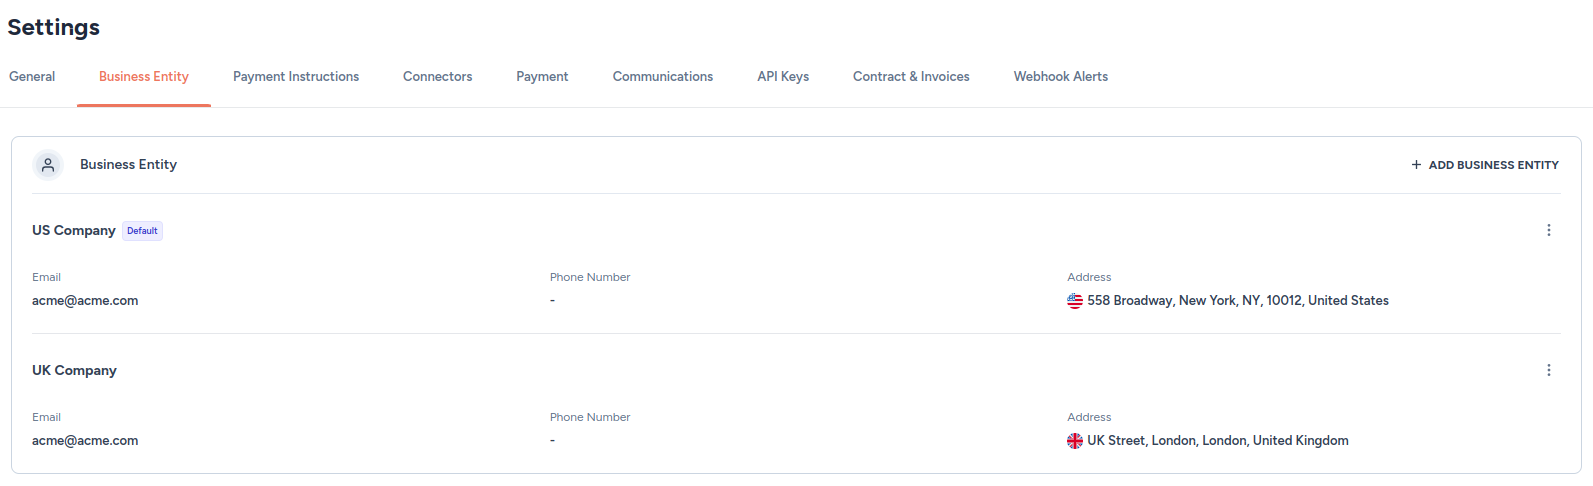
1. On the **Settings** page, move to the **Business Entity** tab.
2. All business entities will be listed, as shown below.
> 🚧 Note
>
> A newly customer is automatically assigned to the default business entity.
### Add a business entity
1. On the **Settings** page, move to the **Business Entity** tab.
2. Click on the **+ ADD BUSINESS ENTITY** button.
3. Fill in the following details:
* Entity name (required)
* Email of the entity (required)
* Phone number
* Address, including city, state, and zip code
* Country (required): United Sates (USA) is the default
* Set as default business entity
4. Click **ADD**.
### Edit a business entity
1. On the **Settings** page, move to the **Business Entity** tab.
2. Click on the kebab menu located at the end of the row containing the business entity you are interested in, as shown below.
3. Edit any of the following details:
* Entity name (required)
* Email of the entity (required)
* Phone number
* Address, including city, state, and zip code
* Country (required): United Sates (USA) is the default
* Set as default business entity
## Set up payment instructions for business entities
1. On the **Settings** page, move to the **Payment Instructions** tab.
2. Click on **+ ADD PAYMENT INSTRUCTIONS**.
3. Add the following details:
* **Entity**: from the drop-down menu, select the entity to which you desire to add payment instructions.
* **Currency**: from the drop-down menu, select the currencies for which you would like to use this payment instruction.
* **Title**: enter the title of the payment instructions.
* **Description** (optional): enter a description for the payment instructions.
* **Set as default business entity**
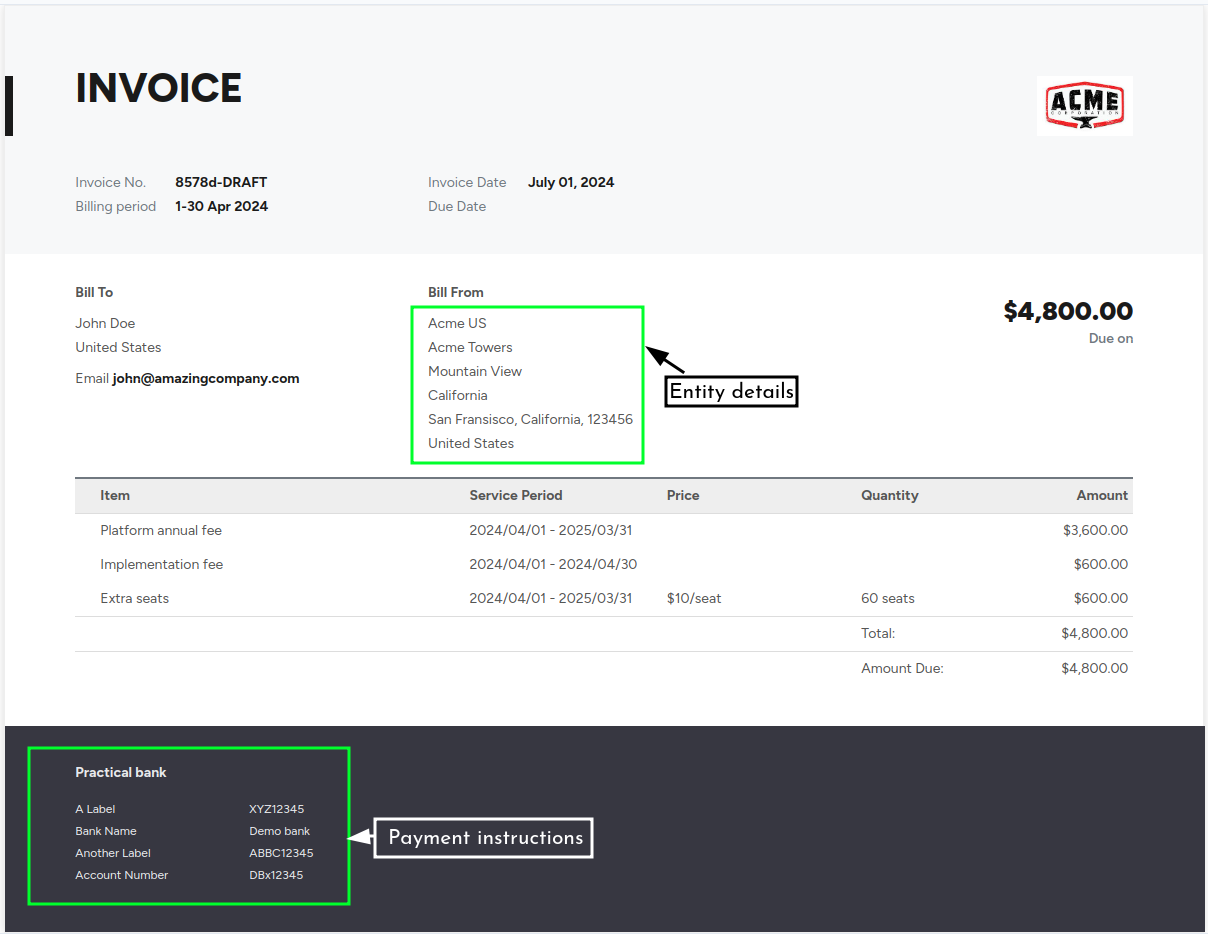
* **Bank details**: add bank details in label–value form. These details will be displayed on the invoice.
* **Bank name**: enter the bank name.
* **Account number**: enter the bank account number.
* Click on **+ ADD FIELDS** to add more
4. Once added, all payment instructions can be viewed in the **Payment Instructions** tab.
## Entity details and payment instructions displayed on the invoice