Documentation Index
Fetch the complete documentation index at: https://docs2.zenskar.com/llms.txt
Use this file to discover all available pages before exploring further.
Prerequisites
- Familiar with how S3 Event Sync works? If not, read how S3 Event Sync works before continuing.
- Access to your AWS account with permission to create or modify S3 buckets and bucket policies.
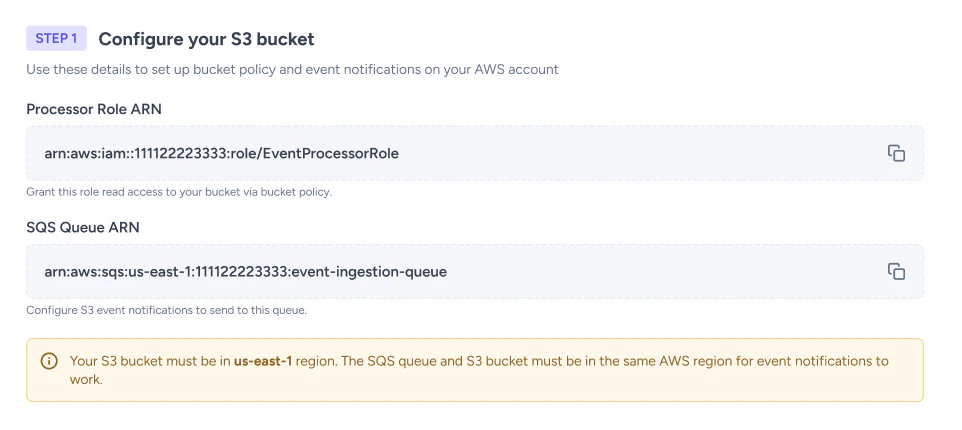
- Your Processor Role ARN and SQS Queue ARN from Zenskar. Both are available under Settings > S3 Setup.
Part 1: AWS setup
Step 1: Set up your S3 bucket
Option A: Create a new bucket:- In the AWS Console, switch region to US East (N. Virginia) us-east-1.
- Go to S3 > Create bucket.
- Enter a bucket name (e.g.,
your-org-event-export). - Under Object Ownership, select ACLs disabled (Bucket owner enforced).
- Enable Block all public access.
- Leave all other settings as default > Create bucket.
us-east-1 and have the bucket name ready for Step 2 and Step 5.
Existing files in the bucket will not be processed. Only files uploaded after the integration is configured will trigger event notifications.
Step 2: Add bucket policy for cross-account read access
- Go to your bucket > Permissions > Bucket policy > Edit.
-
Apply the following policy, replacing
<PROCESSOR_ROLE_ARN>with the value from Zenskar and<YOUR_BUCKET_NAME>with your bucket name:- If the policy editor is blank: paste the full JSON below.
- If a policy already exists: add only the two
Statementblocks into the existingStatementarray. Do not replace the existing policy.
- Save changes.
Block all public access does not affect this policy. Zenskar’s access is private and authenticated via a specific IAM role, not public access.
Step 3: Configure S3 event notification
- Go to your bucket > Properties > scroll to Event notifications > Create event notification.
- Configure the following fields:
| Field | Value |
|---|---|
| Event name | event-file-created |
| Prefix (optional) | Folder path to scope notifications, e.g. events/ |
| Suffix | .csv |
| Event types | All object create events (s3:ObjectCreated:*) |
| Destination | SQS queue |
| SQS queue ARN | Paste the SQS Queue ARN from Settings → S3 Setup in Zenskar |
- Save.
Step 4: Set up a DLQ bucket (recommended)
A DLQ bucket receives files that fail validation, along with error details, so you can review and reprocess them. If you skip this step, ingestion errors will not be captured anywhere. Create the DLQ bucket:- Go to AWS Console > S3 > Create bucket.
- Enter a bucket name (e.g.,
your-org-event-dlq). - Set the region to us-east-1.
- Enable Block all public access > Create bucket.
<PROCESSOR_ROLE_ARN> and <YOUR_DLQ_BUCKET_NAME>:
Part 2: Zenskar setup
Step 5: Register your bucket in Zenskar
- Go to Settings > S3 Setup.
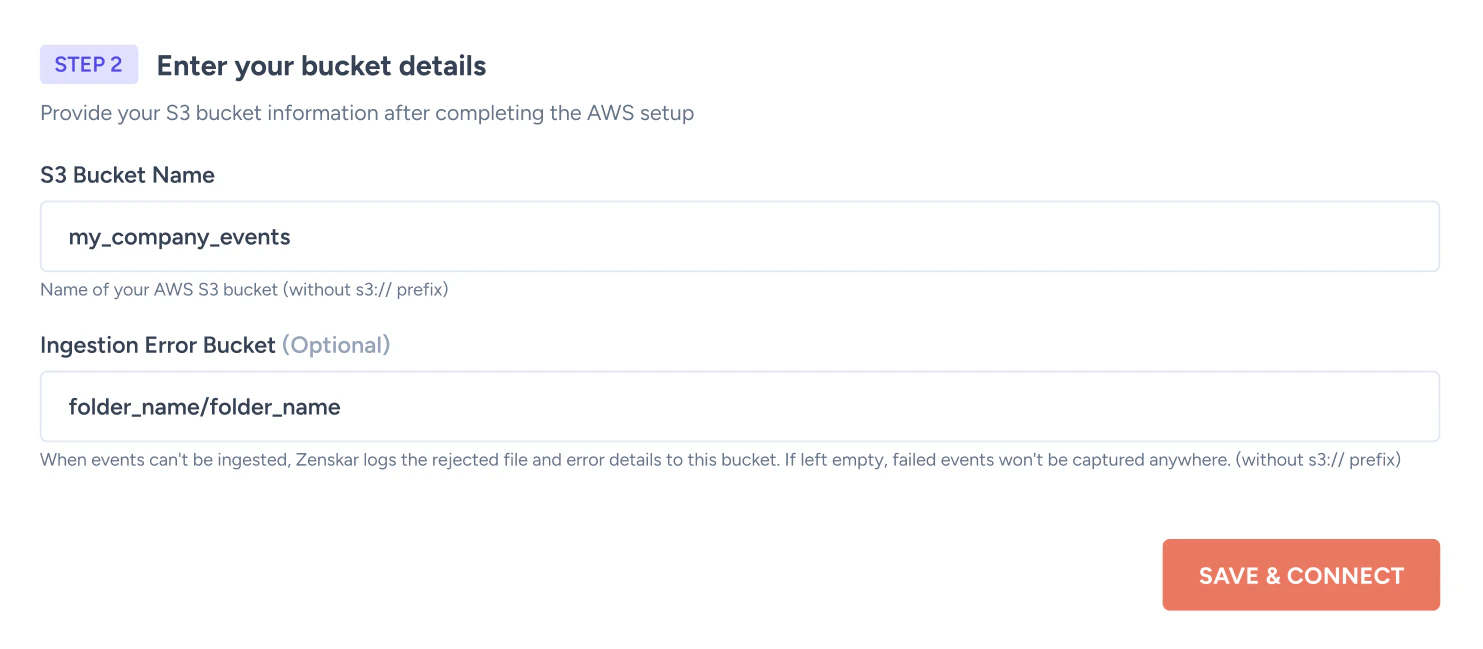
- Enter your S3 bucket name.
- If you created a DLQ bucket in Step 4, enter that bucket name in the Failed Events Bucket field.
- Save.
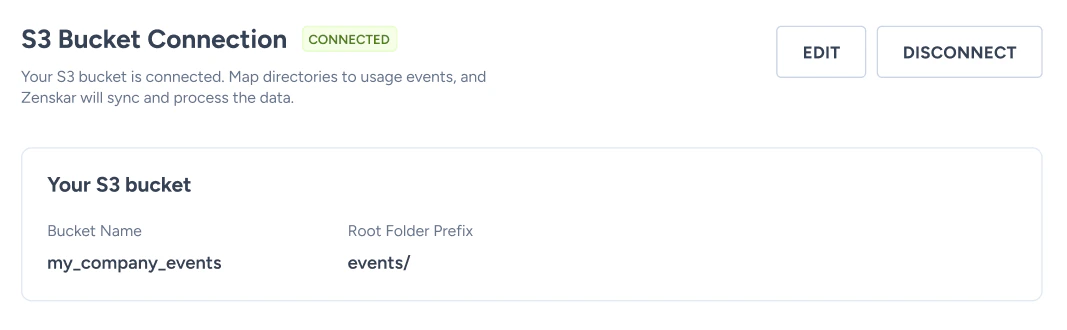
- If the status shows Connected, the integration is ready. Proceed to Part 3.

- The bucket name was entered incorrectly. Check for typos.
- The bucket policy from Step 2 was not saved, or
<PROCESSOR_ROLE_ARN>was not replaced with the actual value. - The bucket is not in
us-east-1.
Part 3: Enable S3 ingestion per usage event
The bucket registered in Part 2 is connected at the organisation level. You must also enable S3 ingestion on each usage event and specify the folder in your bucket that contains that event’s files.On an existing usage event
- Go to Usage Events > select the usage event.
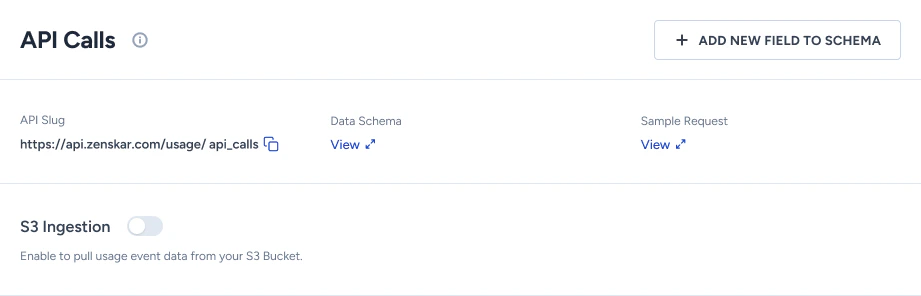
- Enable S3 ingestion.
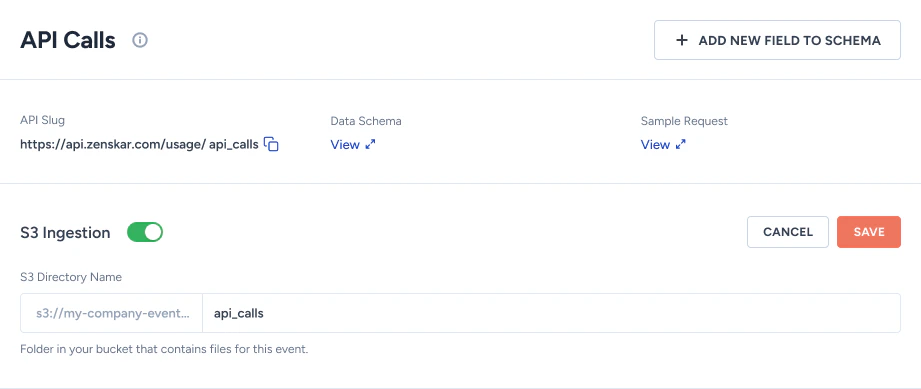
- Enter the directory name: the folder path in your bucket where files for this event are uploaded (e.g.,
events/api-calls/). - Save.
While creating a new usage event
- Go to Usage Events > Create usage event.
- Enable S3 ingestion.

- Enter the directory name for this event.
- Complete and save the usage event.
Verify the integration
Upload a test CSV file to the directory configured for a usage event. Go to the usage event’s details page in Zenskar and refresh — ingested events should appear within a few minutes depending on file size.The connection check in Part 2 only confirms that Zenskar can access your bucket. Uploading a test file is the only way to verify that events are being ingested correctly end-to-end.
File specifications
| Spec | Detail |
|---|---|
| Format | CSV only |
| Maximum file size | 200 MB |
| Multiple files | Preferred over one large file — enables parallel processing |
| Validation | The entire file is rejected if any event fails validation |
Troubleshooting
| Symptom | Resolution |
|---|---|
| Files are uploaded but no events appear in Zenskar. | Check two things in order: (1) the folder path of the uploaded file matches the prefix filter in the S3 event notification (Step 3).(2) that same folder path exactly matches the directory name on the usage event in Zenskar, including any trailing slashes. A mismatch in either place causes the file to be silently skipped. |
| Deleting files from S3 after ingestion. | Safe to do. Once events are ingested they are stored independently in Zenskar and are not linked to the source file. |