Add and authenticate senders who can send emails and notifications to your customers. 🐕This guide will help you to:Documentation Index
Fetch the complete documentation index at: https://docs2.zenskar.com/llms.txt
Use this file to discover all available pages before exploring further.
- set up senders who are authorized to send emails and notifications to your customers
- verify your domain ownership.
🚧 Critical background information
📖 Learn about email authentication, DKIM, DNS, and more. Sending emails and notifications to your customers is a sensitive activity. Cyber adversaries can impersonate organizations and forge emails to target unsuspecting victims. Email forgery is also known as email spoofing.🤔 What is email authentication?
Email authentication is a collection of techniques used to ascertain that the emails sent from a specific server are not forged. It eliminates the possibility of a malicious actor impersonating an organization to send spam or phishing emails. Zenskar takes the threat of email forgery seriously and employs DomainKeys Identified Mail (DKIM) email authentication standard to defend against email forgery. The other commonly used email authentication standards are SPF and DMARC.🤔 How does DKIM work?
DKIM authentication uses public-key cryptography , also called asymmetric cryptography, to secure emails. DKIM leverages the following:- Private keys: secret keys visible only to the domain owner. These keys are used by the sending email server to digitally sign an email.
- Public keys: keys published in Domain Name System (DNS) records for the receiver. These are retrieved by the receiving email server to verify the authenticity of the email.
Your private keys
Zenskar, on your behalf, sends emails and notifications to your customers. To make this possible, we store and handle your private keys. We employ enterprise-grade security mechanisms to secure the private keys we handle.Your public keys
Zenskar will provide you all the necessary records to be updated in your DNS. These records will make it possible for the receiving email servers to retrieve the necessary public keys for verification.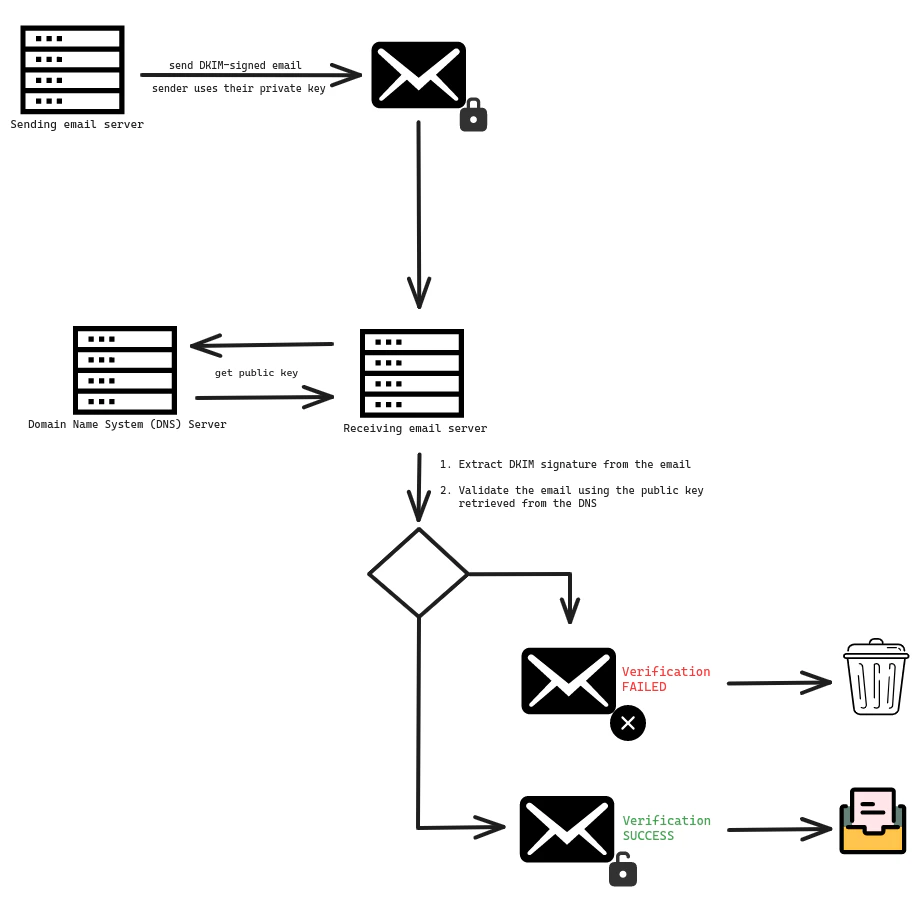
🤔 Adding DKIM records to DNS
A DNS record for DKIM can be:- CNAME: used if the DNS record is a pointer to a key.
- TXT: used if the DNS record contains a key.
example.com domain, the following records will be required:
| Type | Name | Value |
|---|---|---|
| CNAME | <selector 1>._domainkey.example.com | <prefix 1>.dkim.amazonses.com |
| CNAME | <selector 2>._domainkey.example.com | <prefix 2>.dkim.amazonses.com |
| CNAME | <selector 3>._domainkey.example.com | <prefix 3>.dkim.amazonses.com |
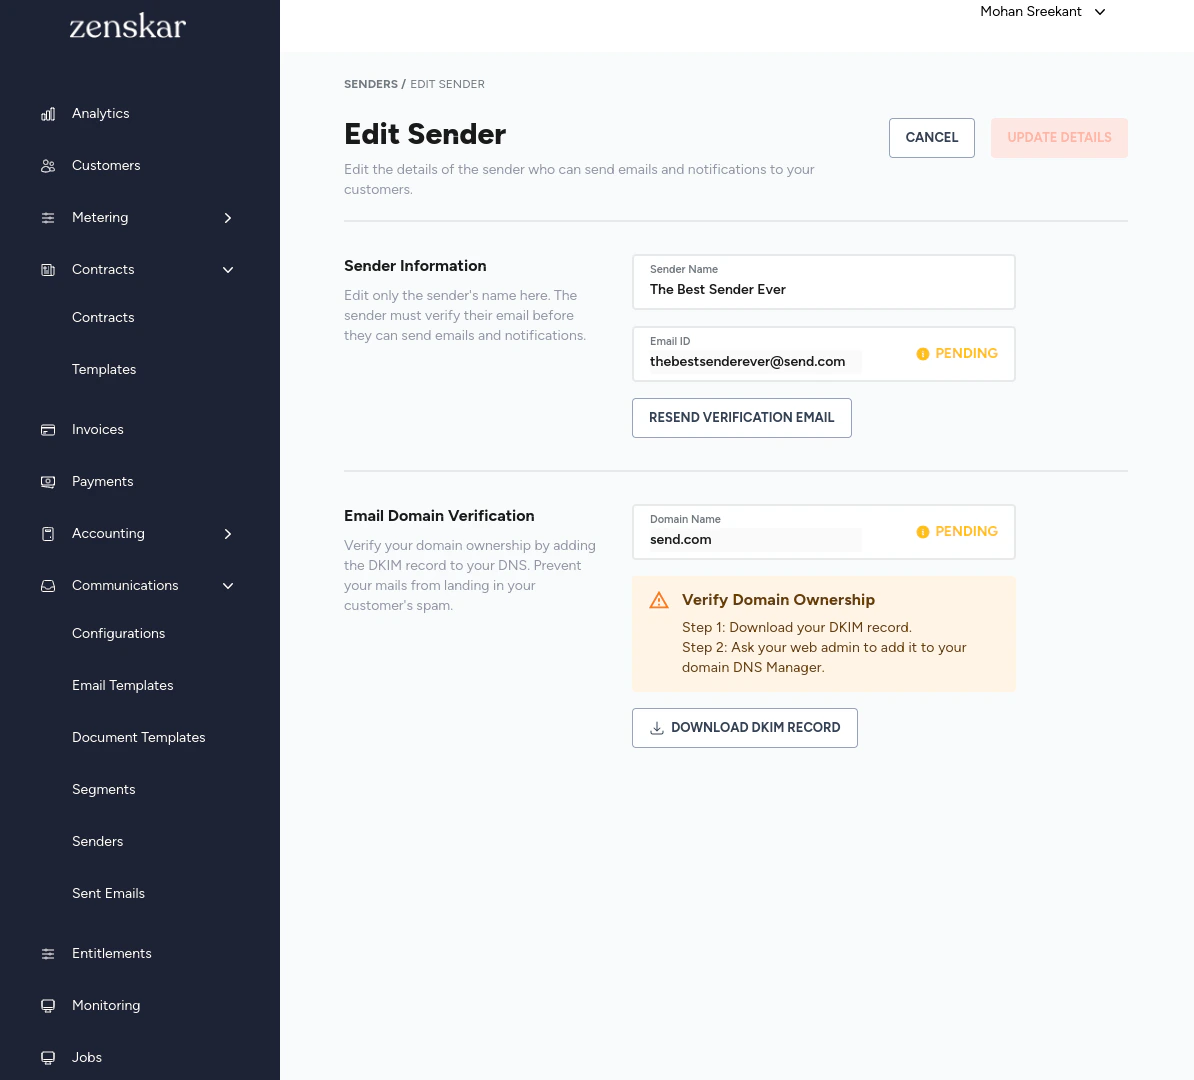
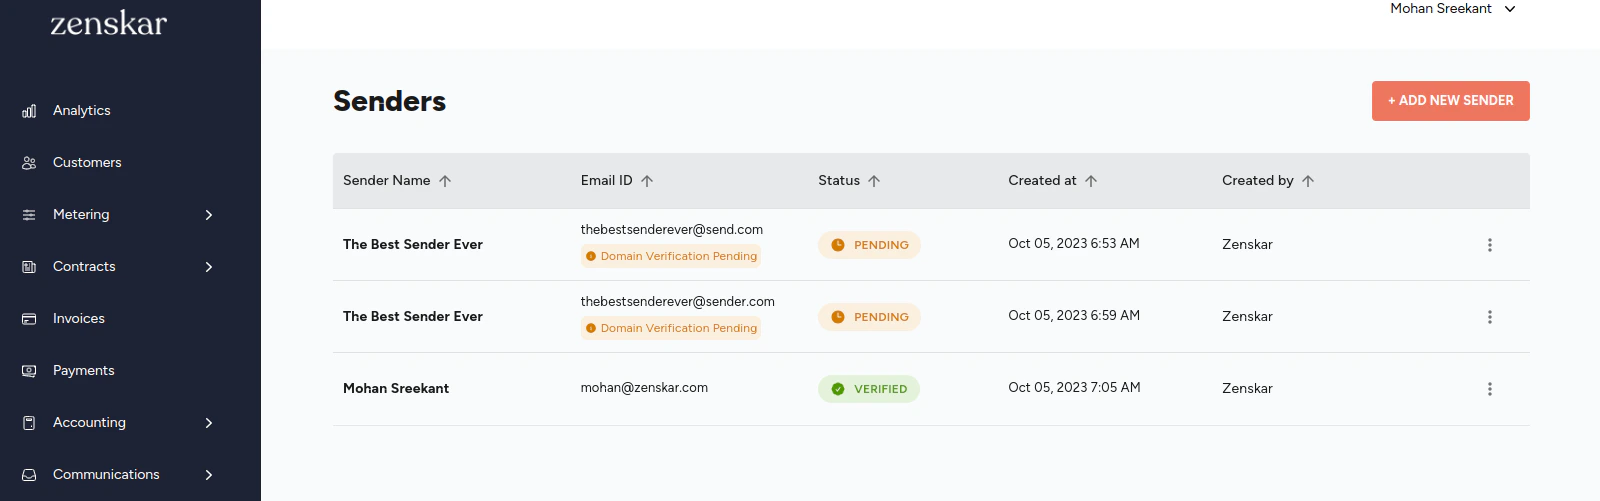
Add a new sender
⚙️ Step 1: Add a sender
- Navigate to Communications > Senders and click on the + ADD NEW SENDER button.
- In the ADD NEW SENDER page, enter the sender name and email Id.
- Click on SAVE & VERIFY SENDER button.
- An email with a verification link will be sent to the email ID supplied.

Sender email verification
The sender will receive an email with a verification link.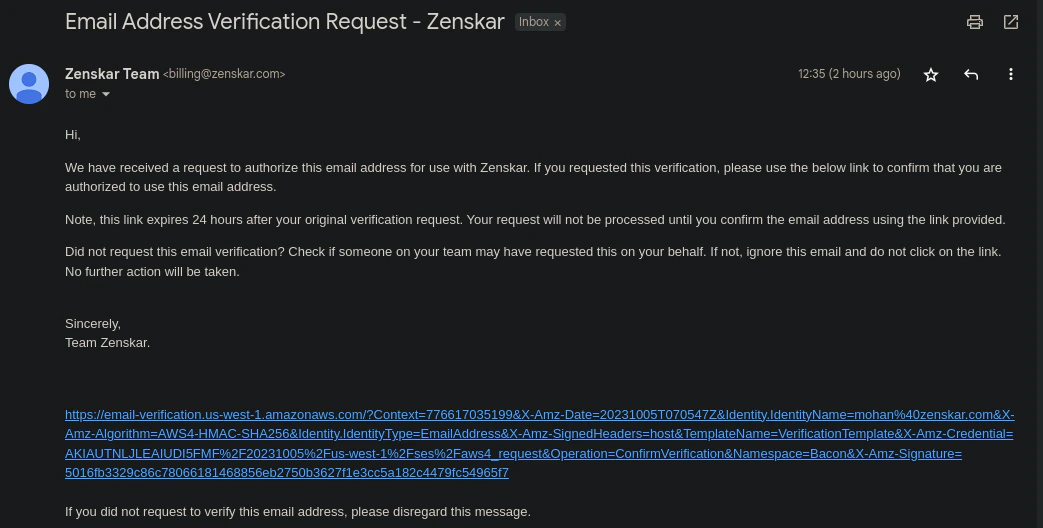
Verifying status of a sender
- Navigate to Communications > Senders.
-
Each sender in the sender list displayed will have one of the following tags:
- PENDING: if the email verification is pending.
- VERIFIED: if the email verification has been completed successfully.
⚙️ Step 2: Domain ownership verification
After the completion of Step 1, you will be automatically taken to the EDIT SENDER page. If you did not download the DKIM records, you may navigate to the Edit Sender page.- Download the DKIM records by clicking the DOWNLOAD DKIM RECORD button.
- Add the DKIM records to your DNS.