Documentation Index
Fetch the complete documentation index at: https://docs2.zenskar.com/llms.txt
Use this file to discover all available pages before exploring further.
🐕🦺 Setup guide
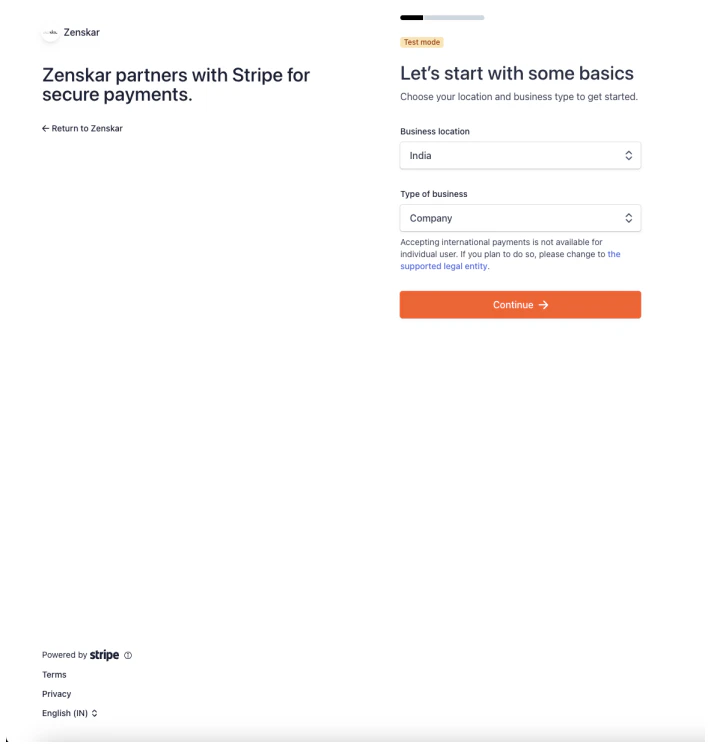
This guide will help you connect your Stripe account with your Zenskar account.Integrate Stripe with Zenskar
- Login to your Zenskar account.
- Go to Integrations > Payment Gateways > Stripe.
- Click the Connect button on the Stripe connector card.

- You will be redirected to Stripe Connect Onboarding flow.
- Login to your Stripe account from the Stripe Connect Onboarding page:
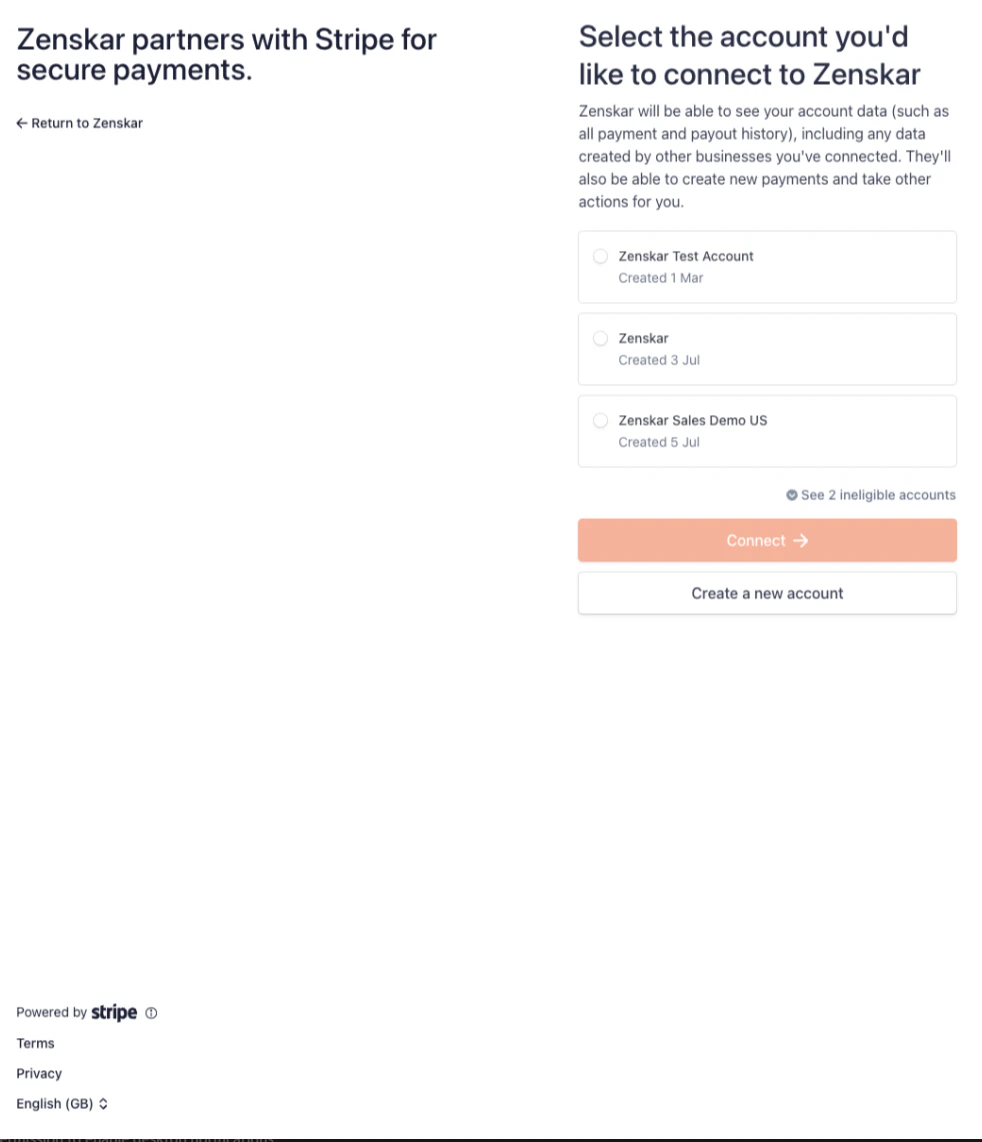
- Complete the on-boarding process, and you will be redirected to the dashboard. A Connected badge on the Stripe connector card indicates a successful connection.
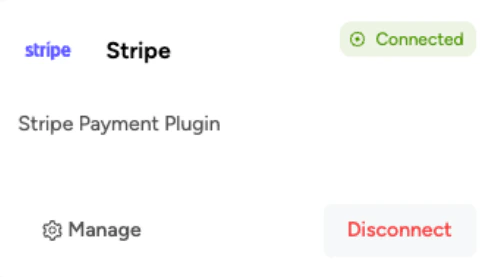
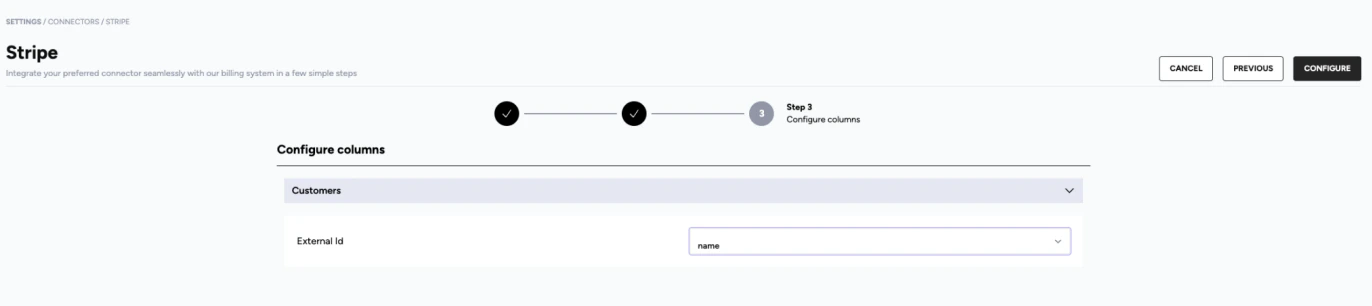
Configure the Stripe connector
- To configure the Stripe connector, you can click on the Manage on the Stripe connector card:

- Import only: any customer information update on Stripe will be synced with Zenskar.
- Export only: any customer information update on Zenskar will be synced with Stripe.
- Import and Export: any customer information update to a selected field on one platform will be synced with the other platform.
- If the sync type selected is Import and Export, a desired customer information field can be selected for two-way sync on the next page of connector configuration:
Features of the Stripe connector
Zenskar initiated payments
- Payment links with different payment methods: When a customer clicks on the PAY ONLINE button on an invoice, a Stripe Checkout session is created for the customer to complete the payment.
-
Auto-charge a customer: Zenskar initiates a payment intent capture on the customer’s default payment method when:
- you click on Charge Customer button on an invoice or
- you charge the invoice(s) from the Invoices page by clicking on the CHARGE button.